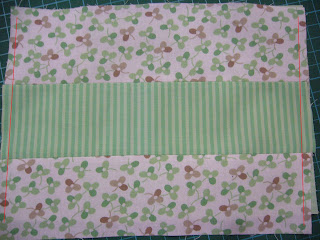
Took some time to select the right colour combination. As I'm using only jelly roll, I had to make sure that the size fits a actual tissue pack. A normal kleenex tissue pack measure about 10cm x 7cm. Need to give some allowance as well.
I didn't have time to take photo as this is relatively an easy sewing project and you can finish it all in 1 hour, quicker if you can made up your mind on the fabric combination to choose! I've used 2 different print - green flower and green stripes. You can also use regular fabric. I'll do another tutorial in the next few days.
Materials
4 pc green stripes jelly roll of 20cm length each [for inner layer and design on outer layer]
2 pc green flower jelly roll of 20cm length each [for outer layer]
Instructions
For the inner layer, sew 3 stripes of green stripes jelly roll together on the long side with 0.5cm seam allowance.
For out layer, sew the stripes in the same way but in the order of green flower+green stripe+green flower.
Place the 2 layers together with right sides facing each other. Do take note of the print cause this will decide how the front will look like. Adjust so that the middle stripe is centralised. Sew along the short side using 0.5cm seam allowance (see below. I don't have the correct photo, but remember to sew on the wrong side!). Turn right side up and press with iron. Sew again on the short side with right side facing up. This will become the opening of the tissue pouch.
Then, fold these 2 side that you have just sewed equally towards the middle. Make sure that the outer layer (the print that you want to face out) is now face inward. It will look like a tissue pouch. Press with iron. Sew along the 2 short sides with 1cm seam allowance. Trim the seams neat. Turn the pouch inside out and sew along the short ends again. The final result below. Will do some more and post photos soon!


No comments:
Post a Comment