Monday, November 29, 2010

Tea towel turned tote bag with attached pouch

Like I said, I was in a Creating mode. So I'm updating the blog with another tutorial. This one is real quick and easy. You should be able to finish this in 1 hour or so if you have all the material with you. It's a tea towel turned tote bag with attached pouch. Yes. It's another tea towel refashioned project aside from my apron tutorial.

I saw these cut tea towel from Spotlight and the material was quite thick so I immediately thought that they would really look good as tote bag. I thought my mum would really love this when she goes to the market or library. The little pouch attached can hold her keys or library card.

Here's the simple instruction.

Material
Tea towel (17" X 27.5") preferably thicker material
Cotton heading tape - 2m
velcro tape

Instruction
Fold the towel into half - 17" X 13.75" and cut away 5.5" from the 17". This portion will be used later for the front pocket and pouch.

From the cut off portion, open up the full length. Cut 14.5" from 27.5" to form the front pocket.

Serge the raw edges.  For the top of the pocket, fold in 0.25" and sew the seam in. Attach this piece to the front of the bag (right side facing up) and sew 2 side seams to form the pocket. I've also sew a line in the middle so that I've 2 pockets.

If you have a serger, serge around the raw edge at the bottom.


Turn it so that right side facing each other and sew the side seam together. You can use the existing towel hem as a guide. Later, you will need to cut this edge off and serge the raw edge else it will be very bulky at the side seam. Keep this cut-off as you will later use them as a fabric tie for the pouch to the main bag.

Sew the bottom of the bag. Flip over to the right side and you have your bag. Next, we will do the strap. Easy right?

For the strap, I've used the white cotton heading tape which is quite soft. So I've use 42" long and fold them and sew the long edge together using a straight stitch. The strap is now 21". You can adjust the length accordingly. My mum is not too tall so I don't want her to drag her bag. Pin the strap, roughly about 3 1/4" from the side.

Make sure that you get the both straps at the same location else it will be messing to pick the threads. Sew them securelly.

Next, the pouch. Take the remaining tea towel piece and serge the raw edges. Fold and sew 0.25" of the serged side seam allowance.

Fold 4" with wrong side facing each other, to form the bottom of the pouch.  Fold the top 0.5" seam allowance inwards and sew in place.

As I intend that the pouch be small, around 4" tall, I cut off the excess 2.5". Serge the raw edge and sew 0.25" seam.

Next, sew the seam seams with 0.25" to form the pouch.


Add the velcro patch to the middle of the flap, about 2" or so.

Lastly, attach the pouch to the tote bag. I want the pouch to be permanently attached to the handle so I use the excess fabric left over and sew them to the inside of the pouch flap. If you want to remove this, you can either add a button or removeable clip.


There you go! A nice and customed made tote bag with a handy pouch to bring to the library or marketing!

Booster Seat Cover

Ever since I bought my serger, I can't resist to use it for all my project : ). Don't know why it's seems to threaputic to see the threads goes into making those wonderful hem...

Over the weekends, I did 2 more project. Will share the 2nd project on my next post. I'm in a Creating mode now. Thank God both my sewing machine and serger are working fine, else I'll be pulling my hair out.

My big girl's booster seat was getting very old and dirty. She has been eating, drinking in the car and in the process, the inevitable happened - spilled drinks and food crumbs can be found on that seat!I had always had in mind to sew her a new cover but lack the motivation. Saw Sachiko did a beautiful booster seat cover for her son, I was quite keen to try one myself. Mine was a bit different in that the whole seat was covered with fabric, not only the centre piece. Anyway, I thought I could use some of the beautiful fabric I bought recently to try.

Materials
Cotton fabric - about 3/4 yard (I've used Nicey Jane Picnic bouquet Tangerine for this project. I think I use less than 1 yard.
Cotton batting 16" X 10"
Ikea seat cover (not sure of the material but it provides additional cushion for the middle seat)
Black polyster belt (those that use as bag handle or similar)
Elastic band for holding seat cover to seat
white thread

Instruction
Took apart the old seat cover to get measurement. Gasp! The foam that was inbetween the fabric has disintegrated and it was quite messy with those loose powery foam floating around my dinning table : (. As the fabric is quite old and crummy, I had to make do with rough estimation and guessimation, if there's such word. It's quite ok but there's some adjustment as the original fabric was a stretch knit and I'm using cotton.

Anyway, I draw out the pieces onto a tracing paper and transfer to my fabric. 4 sets of pieces for the centre, outer and inner fabric for the 2 arm rest and the arm rest itself. I've tried to include a 0.5" seam allowance so that I've a bigger margin for error since I can't find the exact measurement.


First I sew the centre piece. I've used the Nicey Jane as top fabric and a regular green cotton from my stash for the bottom which is not visable anyway. In between, I put a nice cotton batting for more cushion. Sandwich them in order of Top fabric (wrong side face up), bottom fabric (right side face up) and batting.  Sew around the edge and leave a 4" gap on top for turning. Sew around the 4 edges after turning the right side up.


Next, I sew the arm rest. Take the 2 outer pieces and sew the short edge together on the wrong side so that it for a continuous loop from side to back to side. Serge the raw edges.


I've used my serger to serge the seam : )
Now, the tricky part. Attach the inner arm rest pieces to the outer piece with right sides facing each other.  Using pins, carefully align the 2 bigger loops together and pin in place. Sew around the loop and turn out to right side facing. You can try this around the booster seat arm rest to check if your measurement is correct.


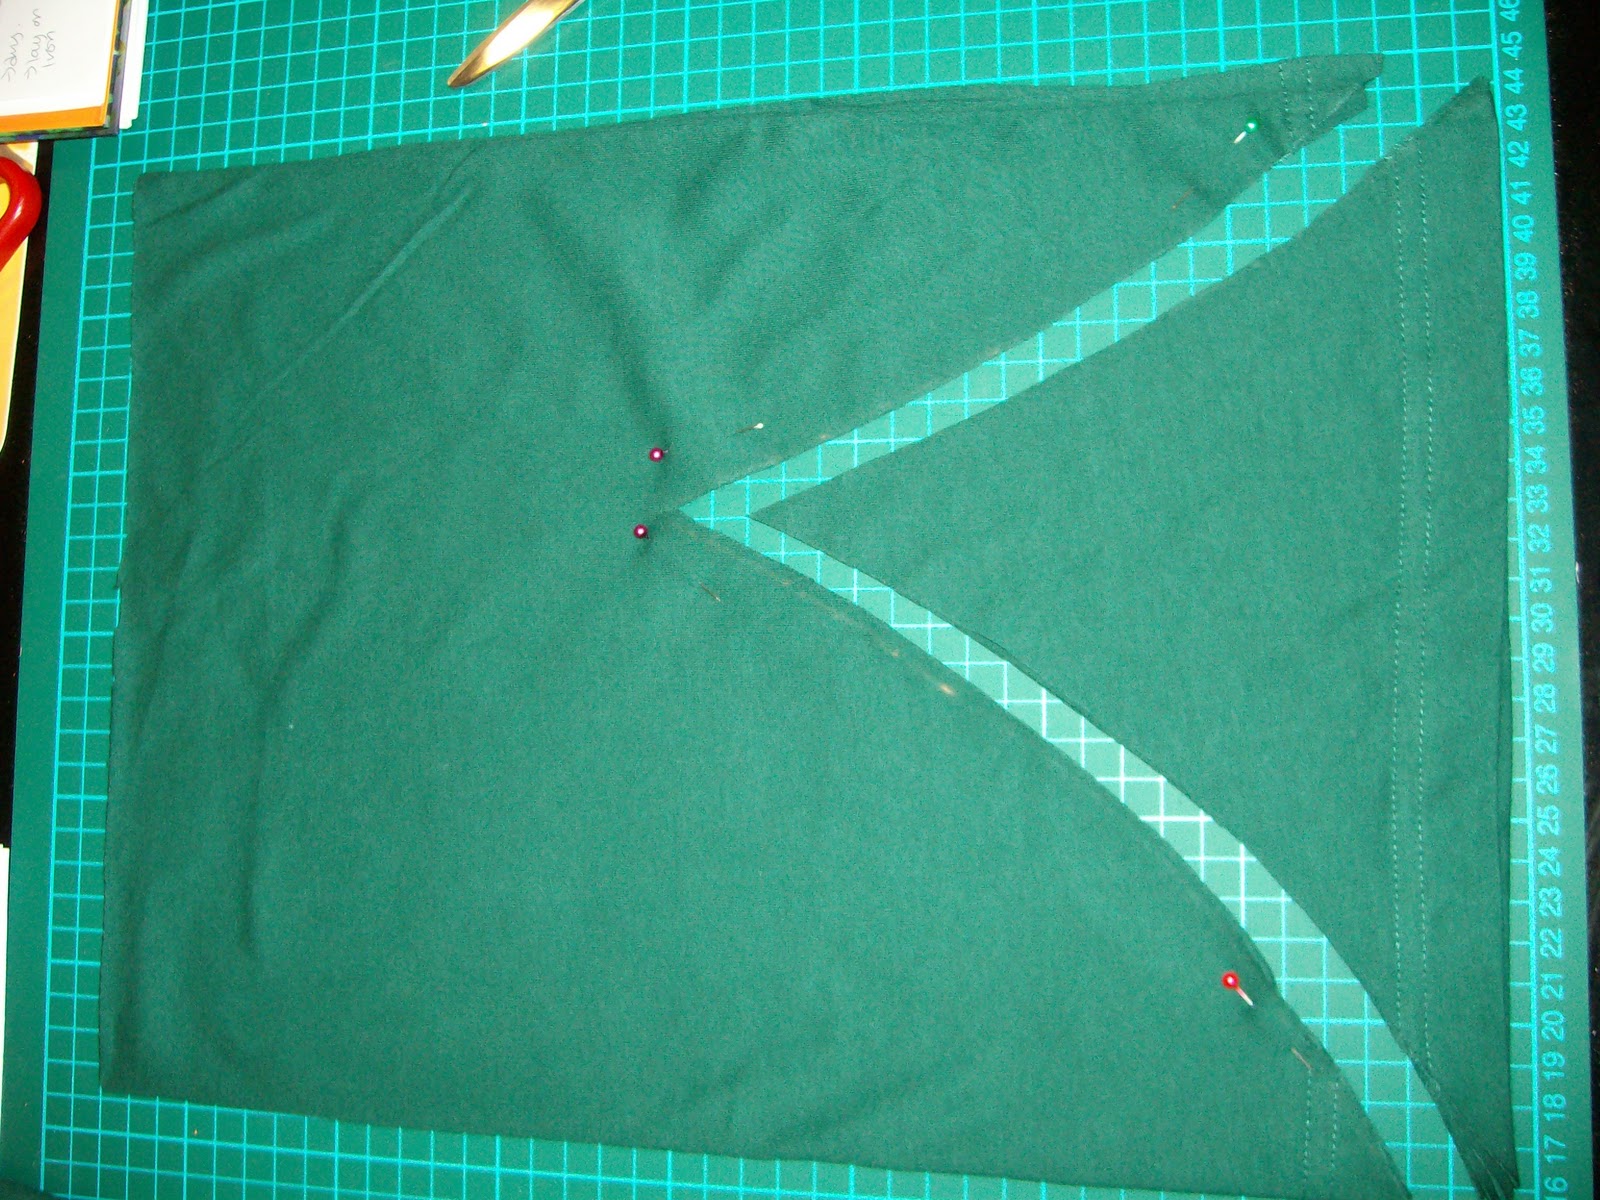
Turn it to right side facing again and continue below. Take the long stripes which is the arm rest piece, and carefully pin it along the concave part of the curve and all along the curve to the small loop. See below for better illustration. Do this with wrong side face up. This step is very important as it determine how fitted your fabric will be on the arm rest. I did it a few times just to get the shape right. It was painful to pick the seams so try to loop on to the booster seat to check the fit before you sew.

a closer look at the arm rest
If you get this correct, the whole stripe should fit nicely between the outer and inner arm rest. Sew around the edge and turn it right side up and try them on the booster seat again. You should have this.
After you are satisfied with the fit, sew the centre piece to the 2 arm rests. You should also place your centre piece on the booster seat together so you can adjust the seam allowance to sew. Pin and sew on the wrong side.


Sew around the top and side seams to join the centre piece to the arm rest piece. I've also add a edge finish to my booster seat using the black polyster belt for decorative purpose.  To fit the seat cover, sew 2 elastic band under the seat cover to hold them to the seat. I've also inserted the Ikea seat cover underneath to give more cushion. It's removeable so i don't have to worry about spoiling them in the washing machine.

side view
back view
That's it! Hope you can follow the tutorial. How long did I spent on this project? Hmm, 4 hours, including cutting. The sewing was simple but the fitting of the arm rest was arrr....Next time, if I had to do this again, I'll most probably use knit as it is more stretchable and the error for margin is higher compared to using cotton fabric. But the fabric is so nice don't you think?

Tuesday, November 23, 2010

Tinker romper

There! I've finally finished the tinker romper for my baby girl. I've mentioned in my earlier post that I've followed the instruction from Samstermommy.  Her instruction is very clear and picture does help. But I've adjusted alittle as it's for my 10month old girl and the bossini XL T that I bought was just the right width for the romper at 34". So for those of you who are reading this in Singapore or Malaysia, you can buy a bossini XL T-shirt and make this easily. Or you can also use a regular knit fabric for this but I feel that since the edges are already sewn, this will be a much easier project using a T-shirt.

Anyway, just follow her instruction. The bossini T measure just the right size for her so I just need to cut the length correctly at 17" from bottom up. Use the elastic thread to sew the smocked area on top. You can use 12 rows of stitches or more, depending on your preference. But be careful when you sew the smocked as the 2nd line onwards are very tricky after the 1st one was sewn. Have to really hold on to the fabric as the line may go off and the final result is less than perfect. For me, since this is a first attempt on using the elastic thread, I'm quite happy that I don't have loose unwind elastic thread. Maybe the next time, I can do better. (already dreaming of any fairy outfit...).

I've used my newly bought serger : ) ; ) to serge the top part of the smocked area as well as the top part of the tinker skirt. As I follow the instruction, realised that I've to alternate between the elastic thread bobbin and the regular thread. So, to minimise the switch, here's the steps you may like to take when you sew this.

Cutting
1) cut the bottom part of a T-shirt for the main romper (I used the entire width of T-shirt and cut just at armpit area = 17" long)

2) cut the small arc at bottom of the fabric joint (2" arc) around the side of the T-shirt (seam area)
fold the t-shirt into 1/2 and cut the arc at bottom along side seam

3) cut the skirt from bottom part of another T-shirt (I used the entire width of the T-shirt, and about 11" in length. You can adjust the length of the skirt according to your preference) Fold the T-shirt lengthwise and draw out the shape. The middle petal shape should be the centre.


Folded side will be the centre of the skirt

open out the skirt. nice and curve petal shape in the middle
4) cut 6 stripes of t-shirt fabric and braid them together to form 2 straps. Later you will need to cut them into 4 straps.


I just use clothe peg to keep them in place till I sew them together
Sewing
1) First serge the top part of the smocked area. You can also use zig zag stitch so that it looks complete. As my bottom of the romper is using the existing T-shirt bottom, the edge already nicely hem.

2) Serge the top part of the skirt. I've used baby lock. I've left the bottom edge free so it looks more fairly-like.

3)  Flip the romper inside out and sew around the arc so that now it looks like a cut trouser. Turn it out and again so that the right side face out.

4) Now for the smocked part of the romper. Sew using the elastic thread in the bobbin and normal thread on top. You can follow her instruction.  As mine is a continuous loop (it's the whole piece of the T-shirt), I did it alittle bit different. I start at the side of the T-shirt (the part with the joint line) and start sewing 1/2" from the top. Go one round and when I reach the end of the 1st line, I sew a few stitches down and start the 2nd line following closely to the 1st line. This is the tricky part. Since the first is already sewn, it curled abit, so you got to hold on the fabric and sew a straight line. Follow through for the next 12 or so lines. Remember to secure the thread in the beginning and end. Throughout the sewing, I've changed the bobbin 3 times. So, need to do this step 4 times.

5) Using the elastic thread again, sew the bottom of both the romper leg areas. Sew twice around using the existing hem as a guide.

6) Take the skirt portion, and sew using the elastic thread, 1/2" below the serged top of the skirt.

7) Now the assemble part. Attach the skirt to top of the romper by sewing (normal thread) along the last line of the smocked line. You must first determine the front of the romper so that the curve part of the skirt is exactly at the centre of the romper. Since you have sewn the leg part, the option is only the front and back : P

8) Attach the straps to the top of the romper by sewing to the first line of the smocked line.

There you go! Can't wait for my girl to wear them. Will update the photo of her wearing it later.
Here's my little girl in her tinker romper. She can't stand yet so photo are not so clear.
finally got her to stand straight!
back view

how do I look?

crawling tinker

Friday, November 19, 2010

I finally bought a serger!

I know I've not been updating the post recently. Didn't have time to update the blog and also haven bought some of my supplies for my sewing project. Anyway, one exciting update I have. I've finally bought a serger for my dress making project!

It's a Brother 3034 serger
Have yet to try it out. Was undecided over buying a Singer or Brother. Good thing about Singer is that sewing the baby lock don't need to remove the metal plate. But Brother's stitch is smaller and more fine. Also I think threading by colour code is much easier but yet to try. I'll let u guys know how it's if I can do some sewing this weekend.

What are the model you are using now? Any of you got a serger? Do share your experience. : )

Monday, November 15, 2010

An update on the tutus

As updated last week, suppose to finish the last tutu for big sister. Which I did. But, alas! She had a fall and had a hairline crack on her arm so she was put on cast and didn't get to wear it. : ( In the end, she had to wear a dress with a large arm hole to the wedding dinner so that the cast can go through. It's a pity cause the tutu was a beautiful turquoise blue with a satin inner skirt. I've used a white satin ribbon to tie around as a wrap around tutu. Looks like a cinderalle tutu?


Did I mention that I made one tutu for my dinner and dance? Well, I did! ha! It was a red tutu with black ribbon around the waist. The theme for the dinner was Red or Silver. So I made a red one. How do I look?

Anyway, although big sister can't wear the tutu, the baby got to wear them. She looks like a sweet princess and everyone said she looks so so sweet. But my hubby said she's like a slippery snake. Cause the tutu was making it hard for him to hold on to her as she constantly move around.


Here's the picture of poor sister in cast...my heart ache. I've promised her that I'll make a ballerina in tutu for her to keep her company while she is in cast. Poor girl.

Wednesday, November 10, 2010

A tutu, 3 dolls and a tinker romper-in-the-making!

Wow! After a long sewing break, I've started my tutu sewing for my 2 girls. Need to get them ready by this Sunday for the wedding.  I've finished the baby tutu.

It measure 9" long as I hope she can wear them for many more years! I've inserted elastic band and put satin ribbon around the hem of the tulle. The instruction is the same as what I did for the other tutu.  It's 52" by 9" wide and I've laid 8 layers. It also has a tiny little pink lining underneath! Can't wait to see her in this. The other piece for my older girl will have to wait as I've yet to buy the dark blue tulle for the dress.

Another projects that I did was the 3 Black Apple dolls that I did for my 2 girls. Can't resist to do them in the dress that I've previously made for them. So cute. You can easily make yourself using the template.  I've made some slight adaptation of including the shoes. The small one is exact copy of the template and the bigger ones are from the 150% of the copy. Thinking of making a ballerina one too.


In addition, I'm in the midst of constructing a tinkerbell romper for my 10 month old girl. It's from 2 XL-size T-shirt. I got it from Samstermommy website. It's quite a simple project but I took some picture so that it's clearly to follow. I yet to continue that as I've not gotton the elastic thread! my my my. Busy time but so enjoyable.

Do you like what I'm doing here? Why don't you just grab some fabric and start working on it. I can assure you that it's very rewarding to see the face of the recipients when they receive the gift. : ) I know mine did!

Sunday, November 7, 2010

Am I insane?

Things have been crazy lately at work. My work used to be desk bound but these few weeks, I had to travel around and meet various people. It's hard on my schedule as a working mum. Sometimes the meeting would be at lunch hour or after work. I felt so stretch and to add to that, my eldest was sick with high fever past few days. Physically, mentally, I'm drained. That explained why I couldn't sew as much as I wanted. I used to do my sewing late at night when they are sleeping, around 10pm and end off at around 1pm. So, late of sleep is the norm with dark circle a trademark of me : P

Why do I still insist to sew till so late you may ask. Am I insane? Well, maybe. But sewing keeps me sane in a way. My body can't escape to another place because my family and work need me. But my mind can dream of wonderful projects and craft that I can do, limit only by my competency, I guess. So, everynight, I'll try to keep my finger busy with beautiful craft. Thank God my husband is really understanding. He didn't discourage me but will give me feedback on my projects and I'll improve on it the next time.

Sometimes, I do wish to quit my job and stay at home to spend time with my young ones. They need me the most now and I'm always pulled in different directions at work and rushing home every evening from work to childcare centre to mother in law place and then home again. It seems like my home is only a place to sleep. I wish I can bring them out and nurture them but financially, it would be a burden to have one 1 income. Singapore is really an expensive place to have kids. : ( Gosh...I'm complaining. Forgive me. This blog is really a good place to air my frustration at times. For you guys who drop by to read my blog, it will be really nice to drop me some comments so I know you've been here. It mean a lot to know that someone likes what I'm doing here.

Anyway, I'll not stop sewing I guess. No matter how tired I am, I still find passion in sewing things. Sometimes my projects went haywired, sometimes, it's surprisingly fast and beautiful. Sometimes I screamed at my sewing machines when the threads keep jamming up, at times, the sound from the sewing is quite theraphetic! Hah! Do you know what I mean? Oh went, need to stop my blah blah now. Got to go on with my work. Baby and girl asleep now. Good time to do some afternoon craft. Maybe a quick fabric wallet. Hopefully, I can post more of the crafts soon. Do drop me a note if you visit.  : )

Friday, November 5, 2010

tea towel turned apron

In the past weeks, I did 3 projects. One turned out bad and I gave up : ( , the other was ok but I'm not really happy about it : 8 and the last one was ok since it is really quick and easy. So, I'll share on this little project that was really easy and quick. All under 1 hour if you got all the materials on hand.

It's a tea towel turned apron. I've meant to make an apron for myself and my girl since she is very much into baking now and mine was getting old. Didn't want to waste money to buy one so I thought why don't I just use a nice tea towel and turn it into a simple apron. I've got this $1.50 tea towel from Ikea that I really like the nice red colour.  The bias tape was a steal at $0.50 from a shop at the textile centre.


Material
1 tea towel [I'm not sure of the size but it seem to be able to cover 2/3 of my body :- P]
bias tape

Instruction
Fold the towel lengthwise and cut away 20cm X 10cm from the top corner of the towel (cut it at the open side, opposite from the folded side). You can use a curve ruler to help you to draw the curve. This will be the arm holes. This is similar to what I did for the pillowcase dress.
Since this is a tea towel, all the edges are nicely sewn. So no worries about fray ends except the areas that you cut off at the arm hole. Open up the towel and get ready the bias tape.

Cut 108cm of bias tape. You can adjust the length based on how long you want the loop to be.  Open up the bias tape. Place the raw edge of the bias tape against the raw edge at the arm hole. Do this on the wrong side of the fabric. Start at the lower end of the arm hole and work upwards towards the top of the apron. Pin in place. Then, take the other end of the same bias tape and do the same on the other arm hole.

match raw edge of bias tape to raw edge of arm hoe

length of bias tape depends on how long you want the loop

You can start sewing the bias tape along the arm holes, taking out the pins as you go. After you have finished sewing them, you can snip along the seam allowance of the arm hole so that the curve is more natural. Fold over the other edge of the bias tape to the front of the apron and sew along the bias tape and arm holes.

Finished loop

For the tie behind, I've used bias tape of 45cm each. Sew the bias tape to the side of the apron for both ends and you are done!